
BIOS Features
GIGABYTE includes the latest version of their UEFI (Unified Extensible Firmware Interface) BIOS with the the Z97X-SOC Force motherboard. The UEFI BIOS offers full keyboard and mouse support while using the BIOS pages with enhanced mouse navigation supported by right clicking the mouse – goes back to previous view if inside a settings pop-up or on a sub-menu page. Note that this right click functionality behaves this way in Classic Mode only. Right clicking in ST (Smart Tweak) Mode displays the Shortcuts menu. GIGABYTE also includes a screen capture utility, which generates a 1024×768 BMP image in normal resolution mode and a 1920×1080 BMP image in HD resolution mode on an attached USB drive upon clicking the F12 function key.
GIGABYTE continues to evolve their UEFI BIOS implementation with the Z97-board line, improving the usability and functioning of the BIOS with the new version. One of the nicest surprises was the ability to run the BIOS in HD mode without any special setup or cable configuration required.
BIOS Notable Features
GIGABYTE continues to innovate with their UEFI BIOS design, offering the user four different interfaces from which to modify system settings and monitor devices. The BIOS' four operational modes include Smart Tweak HD mode, Smart Tweak mode, Classic Mode, and Startup Guide mode. You can switch between ST mode and Classic mode using the F2 function key. Further, GIGABYTE integrated multi-language support into the BIOS with support for 18 languages besides English. On their configurable Home section, they integrated two additional tabs – Recent and Favorites – for easy access to more BIOS settings from a centralized location. The changes wouldn't be complete without additional visual tweaking options for the ST HD mode UI itself with options for changing the background theme and the resolution.
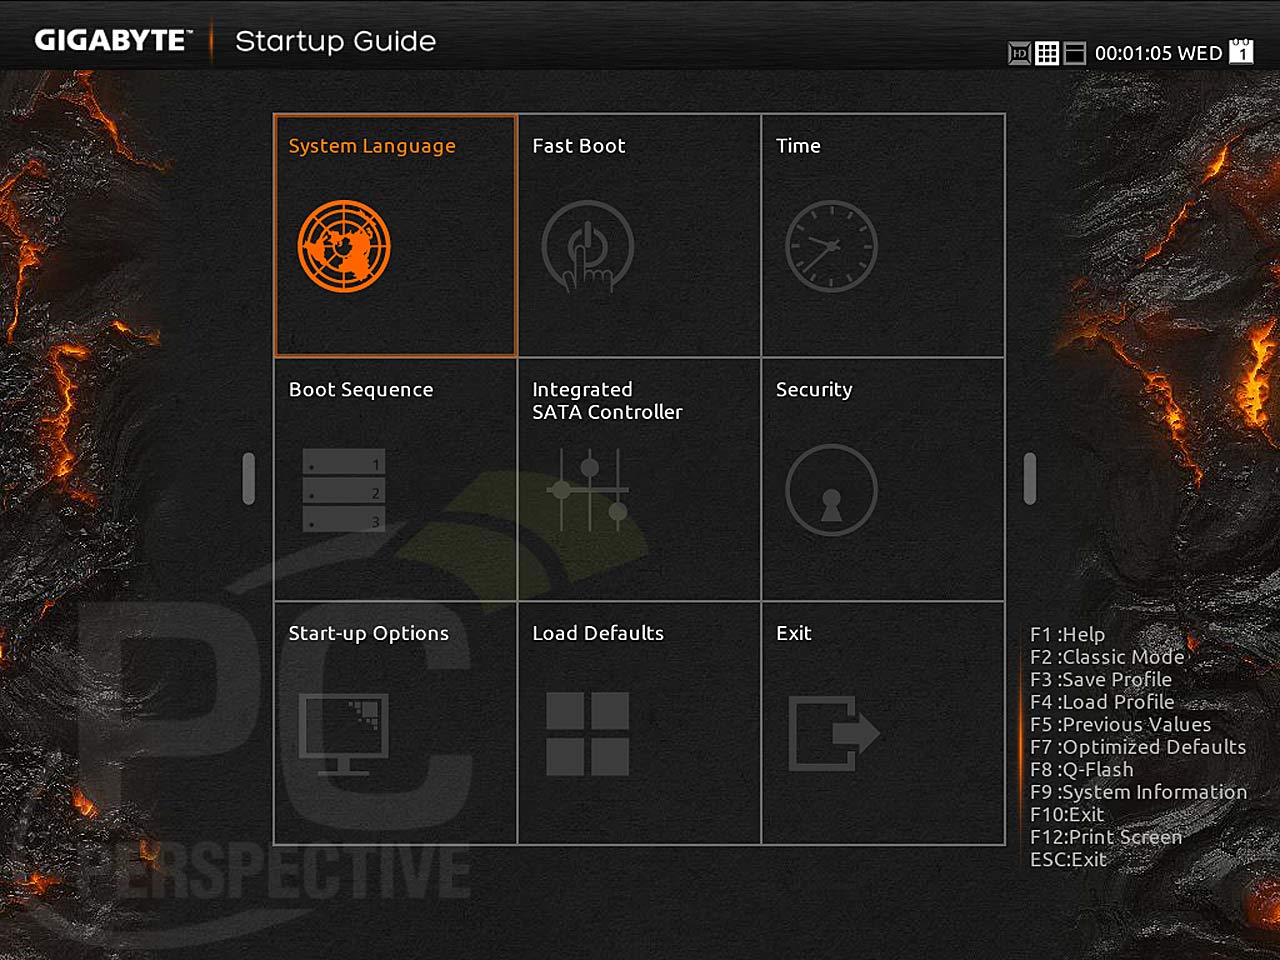
Startup Guide mode, Main page
The Startup Guide interface gives the user a fully graphical UI to set the most common options in the BIOS including BIOS active language, system fast boot, system time, drive boot sequence, SATA controller operational options, BIOS security, and interface-related startup options.

Startup Guide mode, System Language page
Selecting the System Language button from the Startup Guide main page opens the System Language page. From here, you can select one of 19 languages with which to customize the BIOS text and labels.

ST HD Mode
GIGABYTE simplified the UI interface for their HD mode, re-dubbing it Smart Tweak mode and allowing for user customization of only performance-related features. All settings and features present in the Smart Tweak interface also exist in the Classic mode interface.

Startup Guide mode, Start-up Options page
Selecting the Start-up Options button from the Startup Guide main page opens the Start-up Options page. This page allows the user to configure which interface is presented on BIOS startup. By default, the BIOS starts in the Startup Guide interface.

ST HD Mode, Home section, Recent page

ST HD Mode, Home section, Favorites page
GIGABYTE added new pages to the Home section of the ST BIOS, labeled Recent and Favorites. The Recent page hosts settings that you have recently accessed via the ST pages. The Favorites page houses common settings used for board performance configuration.

ST HD Mode, Save & Exit section, Preferences page, Wallpaper settings

ST HD Mode, Save & Exit section, Preferences page, HD Resolution settings
The Preferences page accessed from the Save & Exit section of the ST BIOS houses settings for configuring the look and feel of the Smart Tweak interface, including the background wallpaper and HD resolution. There is a single wallpaper in the list by default with the option of uploading a custom image as well. The selected wallpaper is integrated into the UEFI after clicking the Select button tied to the Background Wallpaper setting. The High Display Resolution setting allows the user to set the ST HD interface to two different resolutions, 1200 or 1600 pixels wide.
BIOS Walkthrough – Smart Tweak HD Mode Interface

Frequency section, Frequency page with CPU Base Clock set to Manual
Frequency section, Frequency page with CPU Base Clock set to base clock speed

Frequency section, Advanced CPU Core Settings page

Frequency section, Advanced CPU Core Settings page continued

Memory section, Memory page with XMP profile enabled

Memory section, Memory page, Memory Overclocking Profiles popup

Memory section, Channel A/B Memory Sub Timings page, Standard and Advanced Timing Control settings
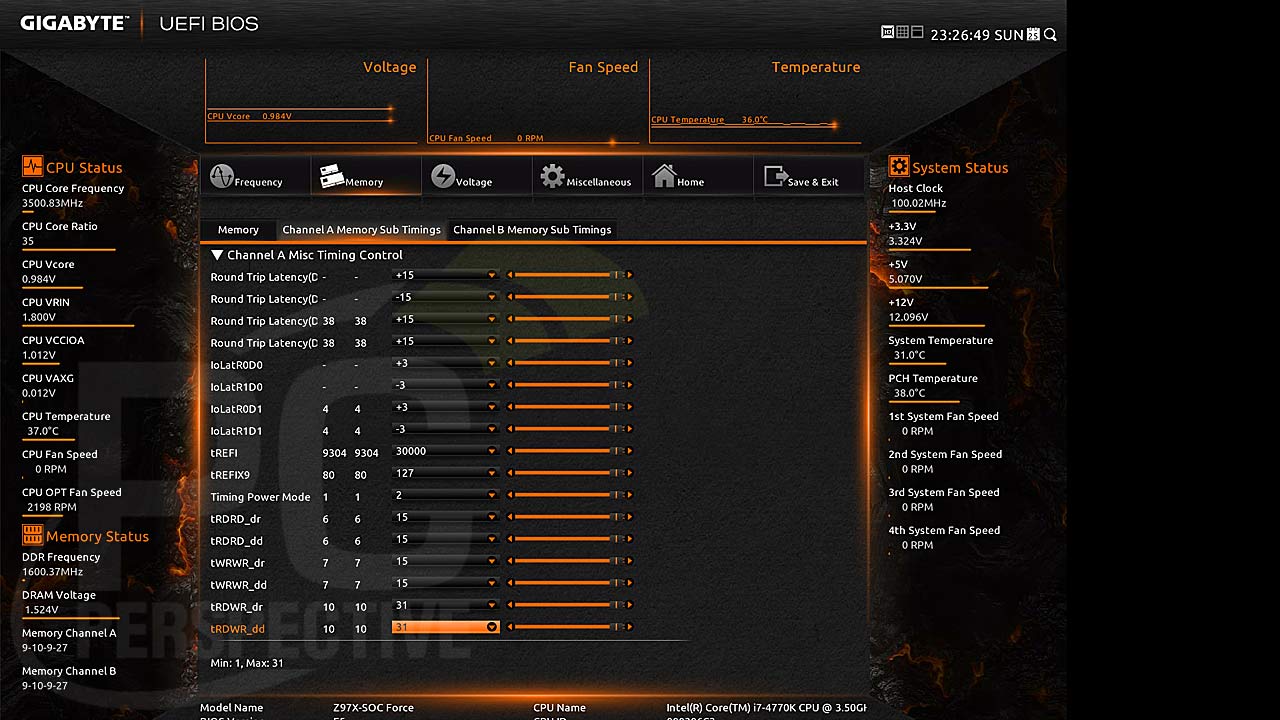
Memory section, Channel A/B Memory Sub Timings page, Advanced Timing Control settings continued

Memory section, Channel A/B Memory Sub Timings page, Advanced Timing Control settings continued

Voltage section, Advanced Power Settings page
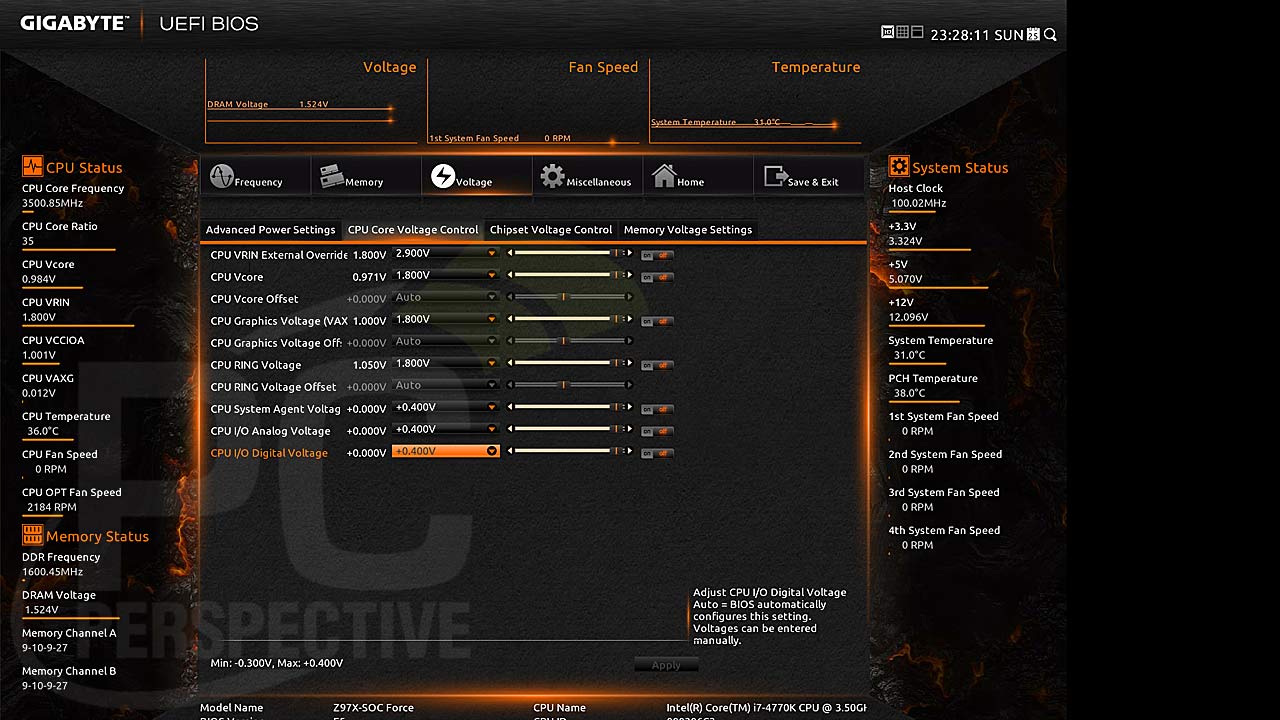
Voltage section, CPU Core Voltage Control page

Voltage section, Chipset Voltage Control page

Voltage section, DRAM Voltage Control page

Miscellaneous section, Miscellaneous page

Miscellaneous section, PC Health Status page

Home section, Performance page

Home section, Your Name 1 page, Setup User Options popup

Home section, Favorites page, Favorites Select a Shortcut popup

Home section, Favorites page, Shortcuts right-click menu popup

Save & Exit section, Save & Exit page

Save & Exit section, Save & Exit page, Save Profiles popup

Save & Exit section, Save & Exit page, Load Profiles popup


fix the pricing section
fix the pricing section
Fixed, thanks for pointing
Fixed, thanks for pointing this out…
What i want to see is a truly
What i want to see is a truly striped down board that is meant to do nothing but overclock. I mean why would you need audio on an OC board, just fill it with PCI-e slots and plx splitters, same thing goes for the onboard video. Get rid of everything that is not needed.
I agree on no need for
I agree on no need for integrated audio, but on these consumer sockets gpu is embeded into cpu so they cannot be removed by board manufcaturers. Also there really is no need of plx chips on oc oriented boards.
don’t see why they could not
don’t see why they could not ditch the ports on the back though, put something like more usb or something there. Also plx chips would be nice of you wanted to bench 4 way gpus not by amd.
Morry, I noticed in the
Morry, I noticed in the Conclusions you noted that the CMOS battery placement was a strength. If I am running Crossfire or SLI, the CMOS battery placement in my opinion sucks, especially if I have my video cards water cooled. What exactly is an ideal place for the CMOS battery and why?
Theoretically, you could run
Theoretically, you could run SLI or CrossFire with the board without impacting the battery. Ideally, the best place for the battery is by the DIMM slots in the the lower left corner of the board, both locations which remain accessible most of the time.
If you start talking about dual or tri-card mode, there are quite a few components that become hard to get to especially when using full sized cards…
Vs it’s predecessor’s battery
Vs it’s predecessor’s battery placement, it’s definitely an improvement.
WHY WHY WHY DO THEY CONTINUE
WHY WHY WHY DO THEY CONTINUE TO PUT PCI SLOTS?!
There are not enough PCI-E
There are not enough PCI-E slots from the chipset to allocate a 1x slot to each board position. Therefore the motherboard makers have a choice of using a PCI-E 1x to 2x PCI bridge which allows for using all seven slots in the ATX spec or leaving one of the slots blank on the board. I can see why they don’t want to leave blank slots, but the slot next to the primary GPU is almost always useless anyways. Some boards also leave the first slot blank and put the primary GPU in the second slot which makes more room for the CPU cooler. and GPU backplate.
Why, oh why, did Gigabyte
Why, oh why, did Gigabyte replace the perfectly good Intel NIC with this killer rubbish? When you ran the network tests, did you have the killer bloatware installed, or just the driver? Also, how exactly was the CPU utilization measured? Does your percentage include the CPU overhead from the simultaneous disk I/O too?
For the network testing, the
For the network testing, the Killer software was installed in addition to the driver. For measuring CPU utilization, Windows Performance Monitor was used with the average measured from that taken as the reported average…