Building the System

With the side panels removed it's easy to see how open a case layout is when drive bays are eliminated. The doors are easy to remove with a simple latch mechanism holding them in place. Simply pull to release the latch as you grip the door, and the entire panel slides upward and out.

Once inside mounting an ATX motherboard was extremely simple as standoffs are preinstalled for this form-factor. Here you can see the motherboard and power supply installed together.

It isn't necessary to install the PSU first, but it is easier (especially when you are using a fully modular design that pushes the limits of the supported depth, as I am here).

On the subject, any non-modular 160mm depth (or less) PSU fits easily with the HDD caddy in place as shown. My modular 160mm PSU is going to be a tight fit since the cable connectors need some room, but I'll make it work!

Testing the limits, my modular 160mm PSU just fits
I am using an AMD system for this build and didn't change out the stock backplate, but any aftermarket cooler can be installed without removing the motherboard as there is a huge cutout behind the board. You will have to remove the included slim ODD bracket (more on this shortly) to have full access.

The cutout area is cluttered in this view, but it's a simple matter to gain full access
Storage
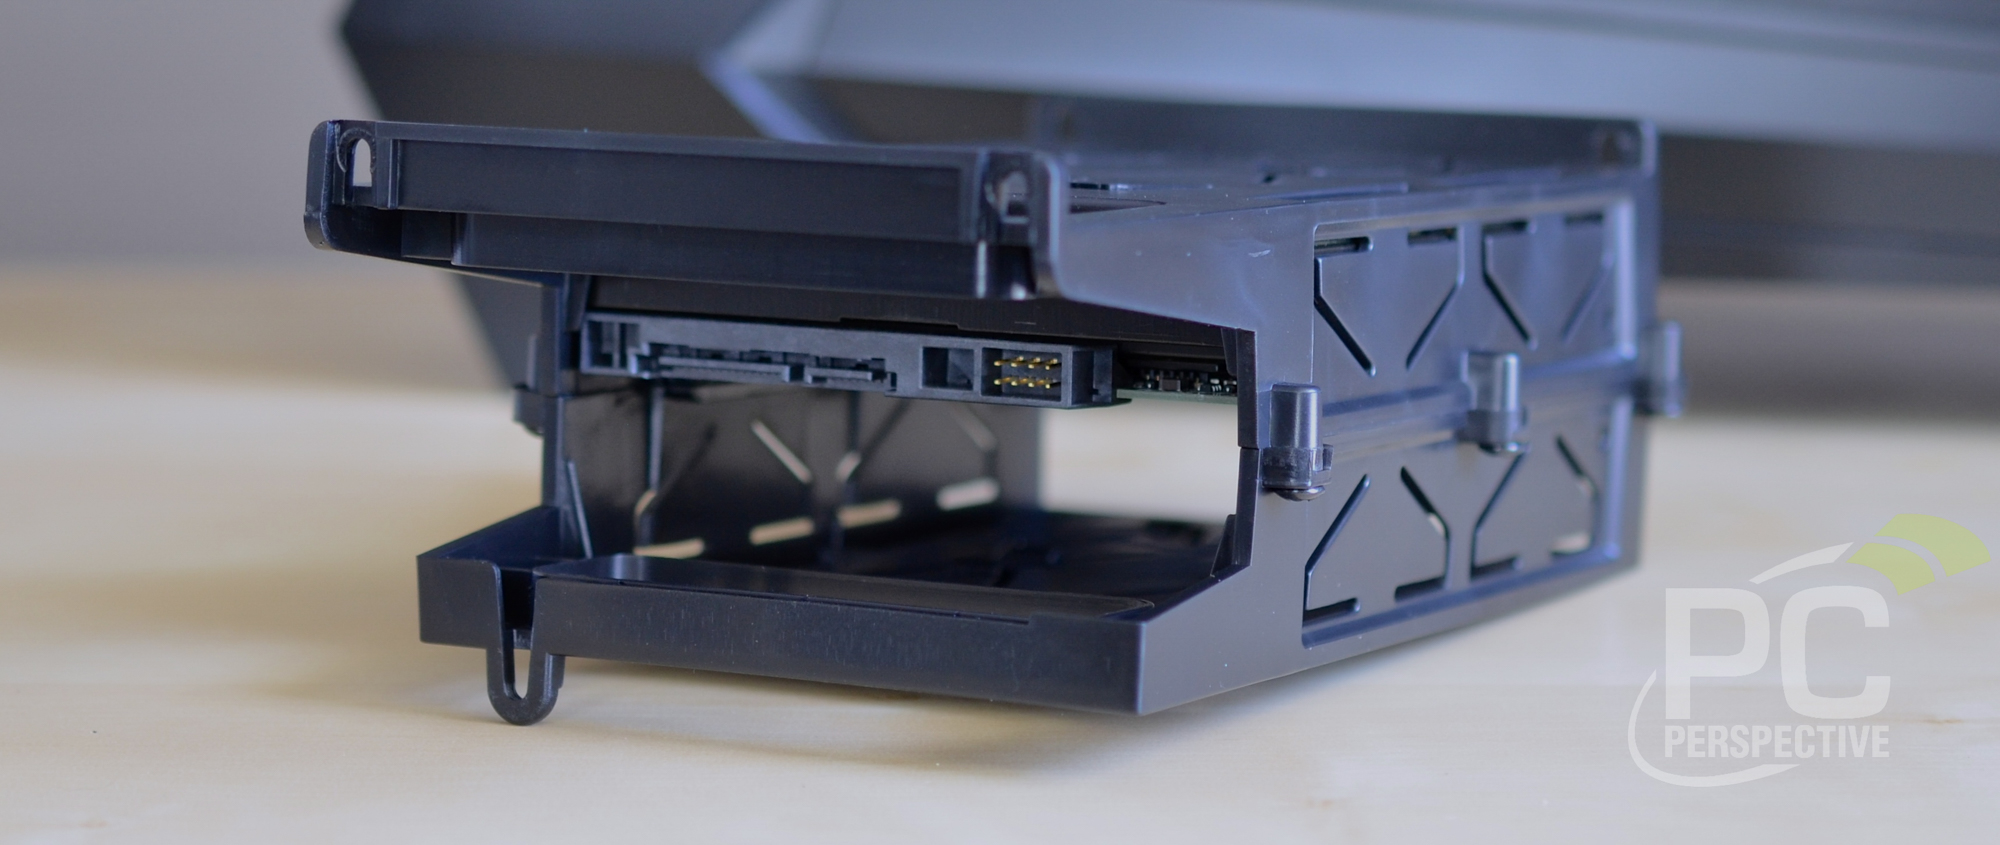
There are in fact no traditional drive bays at all in the RV05, as hard drive storage is supported via a removable plastic dual-drive caddy. This is located below the power supply mount at the back of the case. I chose to remove this right away since I planned to use only an SSD, but I'm in the minority. Removing this caddy is the best way to install hard drives regardless, but you'll want to do this without the PSU installed.

Easy removal of the HDD caddy requires the PSU to be removed first
This slides up and out after the screws are removed, and up to two 3.5" hard drives can be installed easily.
SSD storage is handled via two 2.5" mounts on the rear of the motherboard tray, and my boot drive is installed next to the motherboard cutout we looked at previously.

Next we have the optional slim optical drive bay bracket, which SilverStone has included with the case.

This can be removed if you don't need it, but it wasn't in my way so I simply left it attached. There is an included cover for the ODD slot on the outside of the case if you're concerned about this opening as well.

Finishing the Build
Since I opted against installing a slim optical drive the only tasks left to complete the build were installing the components on the board and fitting a CPU cooler. By default the RV05 has only one 120mm fan mount available, though liquid coolers of up to 360mm are supported if the bottom fans are removed. I wanted to leave the stock intake fans installed so I chose a Corsair H75 all-in-one cooler for the CPU, and it fit easily. Next I connected my graphics card – the mammoth MSI Radeon R9 290X Lightning – which just fits in the case with a little room to spare above the bottom fans. (I measured 12.5" from the expansion slots to the top of the fans, and my R9 290X is 12" at the longest point.)

And here are those bottom intake fans, dual 180mm "Air Penatrator" fans by SilverStone:

These can move a lot of air on the high setting, and the RV05 includes easy speed control from the top of the case.

Next we'll have a look at the completed build from both sides, and then check out the results of some benchmarks before I add some final thoughts on my experience with the RV05.


Does the bottom filter pull
Does the bottom filter pull out towards the front or the back? How much clearance does the GPU have before it hits the bottom fans?
Good questions. The bottom
Good questions. The bottom filter pulls out towards the front, and you have 12.5" before a GPU would be sitting on the lower fans.
Not my style, I’m just to
Not my style, I’m just to old….lol
Haha, I agree. I got the H440
Haha, I agree. I got the H440 and I am sure I made some cooling sacrifices but it looks GREAT and is quiet! My vapor-X r9 290 GPU stays under 70c in that as well.
A little too extreme looking
A little too extreme looking for me but bless them for removing the bloody optical bays. For those manufacturers reading this: Bring on a optical-less mATX case with space for 6 hard drives (hot swap bays even?) and I’ll put in my order.
To me the perfect case
To me the perfect case remains my RV02E, great performance and aesthetics. All the following models look far too aggressive.
As odd as it is, for half the
As odd as it is, for half the price there is a looooooot if nice mini itx options out there I found beat down a ton of +100$ options. It’s pretty awesome, I’ve been lucky enough to try out a good 10-15 styles his year, took my time testing, modding ad tweaking them all. For some reason all of the more high end ones arise issues with durability after a rebuild or three. My opinion, if you like the cube style the BEST case BY FAR has been Thermaltakes V series. All th mini-itx’s of the narrow/tall style have all been depressing in quality, maybe this one might change that, but not for it’s current price.
I thought Silverstone started
I thought Silverstone started making premium cases constructed using aluminum throughout. For a while now, all they seem to be releasing are steel cases. I feel as if we are in one of those low denominator periods with respect to cases analogous to when all the monitor manufacturers went over to 1080p and it was next to impossible to get a 1900 by 1200 monitor. Now, of course, the monitor situation has reversed itself in a very big way; I am hoping the same happens with case manufacturers. Maybe steel will lose its shine as 1080p did, and aluminum will be the go to material for enthusiast cases once again.
I put my first itx build in a
I put my first itx build in a corsair 250D, h100i, bigger front fan and I really like it. I like plain – er cases than this one reviewed. If they did it w/ plain model with internal dampening with the motherboard rotation I would be in…
A case is size is obviously
A case is size is obviously overkill if you’re using mITX (my favorite form-factor), but the plain/damped model of this case actually exists! They made the new Fortress based on the same chassis, and it has sound-dampening along with a much more conservative look. Review coming soon 🙂
This kind of case just
This kind of case just screams DUST COLLECTOR…
I had the RV02 for a while,
I had the RV02 for a while, and it was certainly cool and I loved the top access to I/O, but other than that it was too big and I’ve grown to dislike the plastic look. The FT05 would probably be my choice, but then again I’m fairly satisfied with my current Define R4.
On a side note the 90 degree mobo can cause issues for some aftermarket GPU coolers. I would not recommend using an Arctic Accelero Xtreme in this case for example.
Hummm All my water cooling is
Hummm All my water cooling is 180mm I wonder if I can fit my 2×180 radiator on the bottom with my 7950.