
Bottom & Side Mounting Radiators


In the bottom section of the case, Thermaltake designed the Core X9 to support side-mounting or bottom-mounting of fans and radiators to the case. The same mounting brackets are used to bottom or side mount the fans/radiator, of which three total are included with the case. The bracket support mounting of two 120mm fans or 1.5 140mm fans.


With the PSU installed in the bottom left position, it gives a good view of how much space is available for a side or bottom mounted radiator mounted in tandem with a PSU. With the PSU installed on the same side, you could side or bottom mount a maximum of a 240mm (2 x 120) or 140mm radiator using a single bracket mounted to the slot in front of the PSU.
Side-Mounted Radiator


Side-mounting a radiator using the provided brackets is as easy as mounting the radiator to the bracket directly or mounting it to the bracket through a fan. Because there are only three brackets provided by default, you may have to get creative with the bracket mounts as shown in the pics. The 360mm radiator shown is side-mounted to a single bracket using two of the fan mounts only. Even without the lower portion of the radiator secured, the bracket provides more than enough stability to hold the radiator in place. As you can see from the full side pic, there is more than enough room to easily accommodate a 480mm or 420mm radiator – I just happened to have 360mm radiators on hand at the time of the review. There is also plenty of room between the top of the radiator and the front case wall, reinforcing just how big this case is and how well it was designed for water cooling.

From the top down view, it becomes much more apparent how wide the case is and how much physical room is provided on each side for either drives or radiators. The 360mm XSPC radiator shown is a double thickness variety with fans on the inner side and there is still plenty of room between the fans and the center line of the case (more easily visualized by looking at the wall of the cover in mounted in the back left of the case). You could easily use fans in push-pull configuration with the radiator shown, or using a thicker radiator. The inlet/outlet barbs at the top of the radiator are easily accessible with plenty of room for tube runs as well. Further, the front of the case remains freed up enough for a front-mounted radiator if desired.
Looking at a closeup of the back of the radiator, you can better see the amount of room available between the radiator and the case's PSU cover in the back left of the case. There is plenty of room available for airflow as well as tube routing (if the radiator were flipped with the top facing the case back), even if you desired to using fans in a push-pull configuration, instead of the pull configuration shown. Further, there is room to place a drain port should the radiator have ports on its bottom.
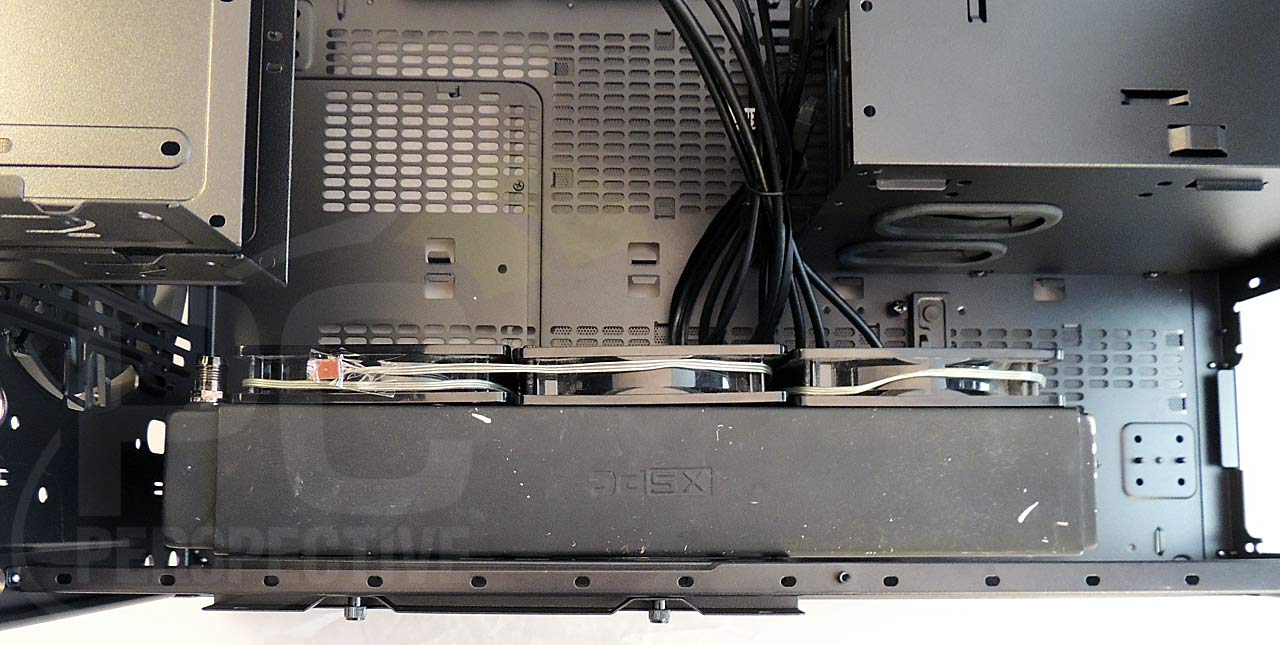
Bottom-Mounted Radiator


Bottom-mounting a radiator using the provided brackets is as easy as side-mounting them to the case. The same brackets are used and support the same sized radiators along each side of the case bottom – up to 480m (4 x 120mm) or 420 (3 x 140mm). The XSPC 360mm radiator shown is bottom mounted with a single bracket mounted to the case in the front right position of the case. As with the side-mounted radiator, the bracket provides more than enough stability to hold the radiator in place even without the lower third of the radiator supported. There is also more than sufficient room to accommodate the maximum sized 480mm or 420mm radiator along all sides. Bottom-mounting the radiator as shown has two caveats to consider though. First, you may limit the size and position of the front radiator that can be used. Second, the pass-through holes in the PSU cover are either partially or fully blocked.

The front view of the bottom-mounted radiator exposes how much room is available for the radiator and tubing routing. With the radiator bottom-mounted in the front position limits the ability to front mount a radiator to case. To front mount a radiator with a bottom-mounted radiator in the position shown, you would need to remove the 5.25" device bays.

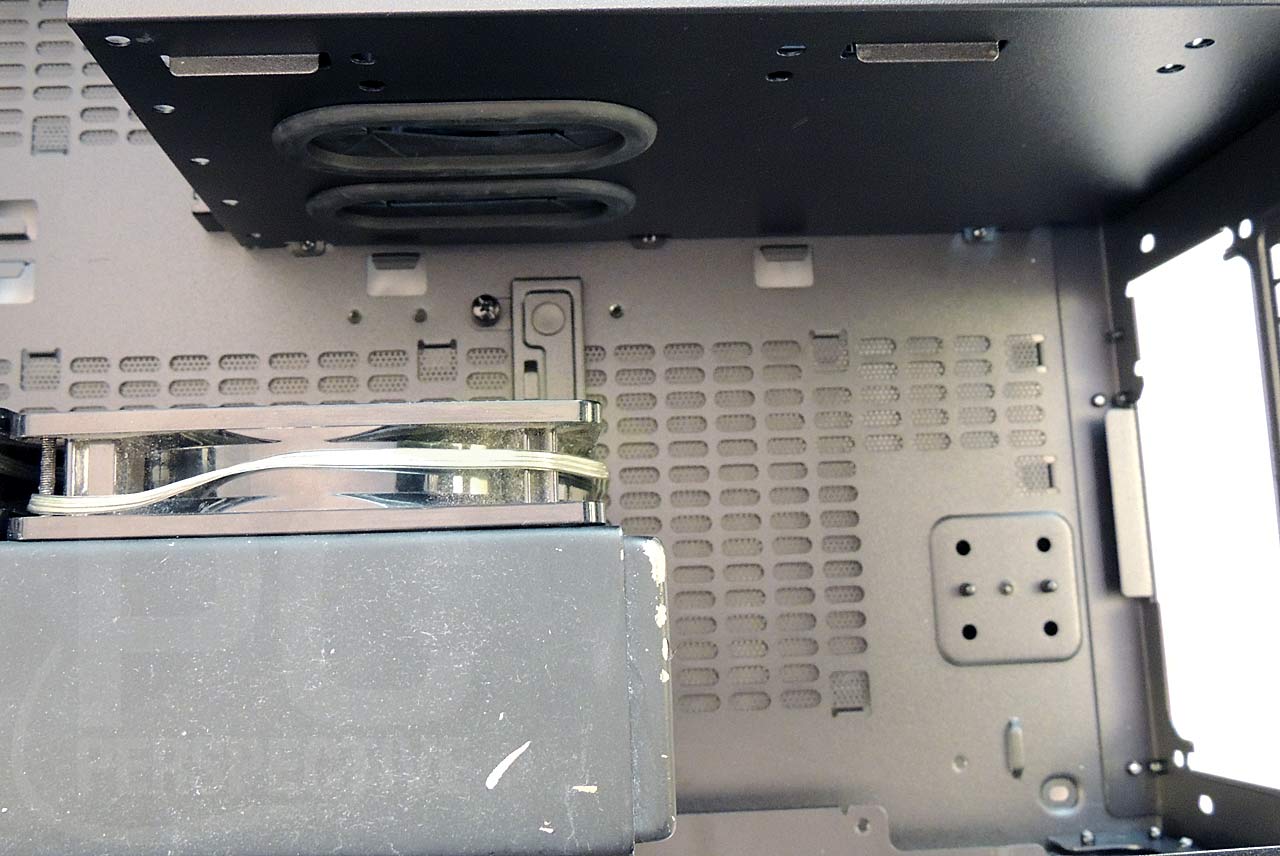
Looking at the back end of the radiator, you can see that there is more than enough room to accommodate even the thicker XSPC radiator with fans on one side of the radiator. Further, the under-tray drive mounts remain fully accessible and usable in this configuration. If you wanted to use a push-pull configuration with a bottom mounted radiator, you would need to remove the under tray 3.5" drive mount to allow for the addition height requirements. You can also see that there is plenty of room left to push the radiator to the backside of the case or to accommodate a 480mm bottom-mounted radiator.


I couldn’t really get a sense
I couldn’t really get a sense of the massive scale for this case until I saw how tiny the DVD burner looks on the front panel. What an absolute beast!
That is huge. Should have the
That is huge. Should have the option to use it as a coffee or bedside table by mounting tempered glass on top.
It can heat your coffee too,
It can heat your coffee too, I suppose. 🙂
Please do one for the little
Please do one for the little brother V21.
Sorry Morry, but you missed a
Sorry Morry, but you missed a point on one count. Most (all?) of problems with clunky tubing can be easily solved with X-Flow radiators. I understand you didn’t have one on hand, but still IMHO it deserves a mention. At this moment in time I see no point in mixing PVC and PMMA/PETG – even for sample system ;).
can this host 2 mobs ?
I want
can this host 2 mobs ?
I want in a single chasis windows and linux
Not in its default
Not in its default configuration. You would have to mod to to host multiple motherboards…
do you know an optimum
do you know an optimum chassis for my purpose ?
thanks in advance
you could try something like
you could try something like the Thermaltake Core X1 or Core X2 if you are planning to use mITX or mATX motherboards, both cases are stackable…
Great case. I have 3 XSPC
Great case. I have 3 XSPC RX480 rads in mine!
I ditched the HDD case and
I ditched the HDD case and used the brackets on the right lower side for the 3rd 480 rad.
BTW, EXACT swivel casters can be purchased from Apollo Caster Co (online) where the metal brackets exactly line up with the holes in the floor. Cost me @$20 and the BEST purchase I made for a heavy WC system.
Sounds like a nice build (3 x
Sounds like a nice build (3 x 480 rads that is). Do you happen to know the exact name or product number of the casters you used for your build?
Sure Morey:
4 ea. 40mm
Sure Morey:
4 ea. 40mm Twin-Wheel Caster with a Nylon tread, Top Plate connector, and Black finish (#68392) $6.68 per caster.
That part number is from their catalog. Took me awhile to find it but it matches perfectly.
I LOVE this build. I have
I LOVE this build. I have this case with very similar parts. Will be switching to hard line tubing and adding a second card soon and with it another 65mm thick 360 Radiator. I love that you have one pulling down, mounted on bottom.
I’ve been back and forth on where to put it, have so many options…
Not sure why I didn’t think of it but that’s perfect…She’s going to be so beautiful…I have one of those monstrous Radiators on top already and it holds the weight just fine and looks great.
Thank you so much for this build idea!
Always glad to help out and
Always glad to help out and share ideas. I was really glad how well the top and bottom radiators lined up, especially since they are from two different manufacturers (Swiftech on top and XSPC on the bottom). The straight up and down run gives it a really clean look. Please share pics of your build, I'd love to see it.